Building with Hebel
Hebel is a highly versatile building product, available in blocks or panels, and suitable for use in a range of applications.
Hebel is easy and efficient to install and can result in less onsite mess and wastage compared to other masonry applications.
When installing with Hebel, it’s important you observe safe working practices. Please refer to Working Safely with Hebel for more information.
General guide to installing with Hebel
The following is a general guide to installing with Hebel. Hebel must be installed, rendered and signed off by a Licensed Building Practitioner (LBP). If unsure or your project requires more technical advice, seek professional advice. The Hebel customer service team may also be able to assist on 0800 4 HEBEL (0800 443 235) or +64 3 336 5500 (if calling from outside NZ) 9am – 5pm, Monday to Friday.
Cutting Hebel
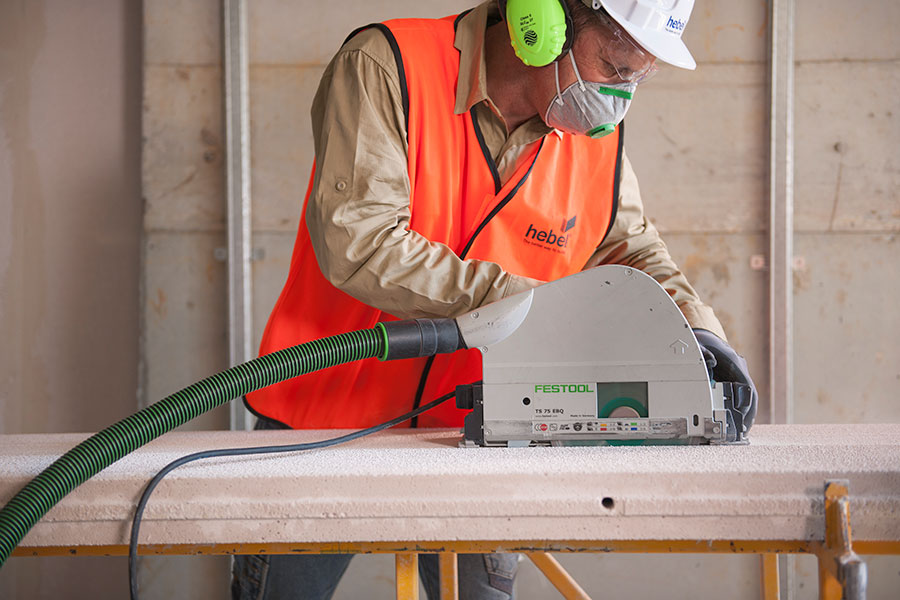
Tools:
- For blocks – use a specially designed tungsten tooth AAC saw. For smaller projects, you can use an aggressive tooth timber hand saw
- For panels – use a circular saw fitted with a continuous rim, diamond tipped ‘turbo’ masonry blade, ideally connected to a dust extractor
Safety gear:
- P1 Dust Mask for all fabrication that creates dust
- Safety glasses
- Hearing protection when using the circular saw
- Gloves
Working safely:
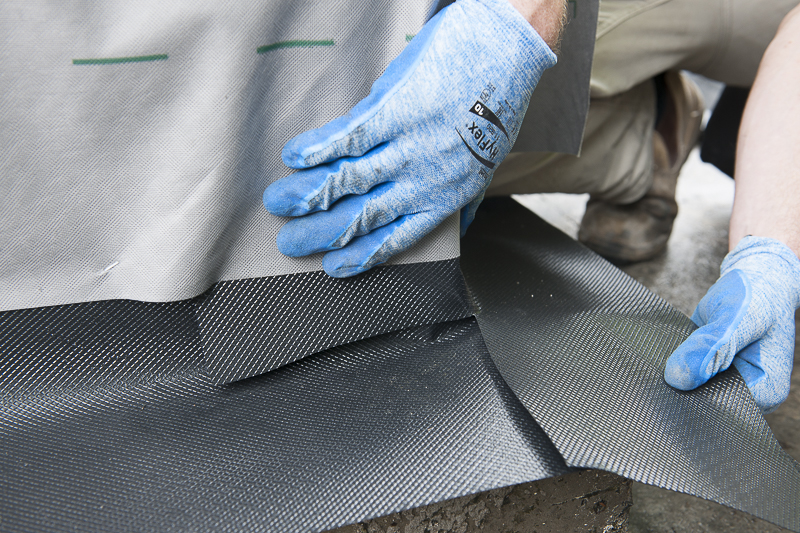
- Use gloves when handling raw Hebel to avoid skin abrasion, and remember that cut panels can have exposed steel with sharp edges
- Use a proper guide fence when cutting Hebel panels
- Ensure panels or blocks are secured down when cutting
- Find out more about working safely with Hebel
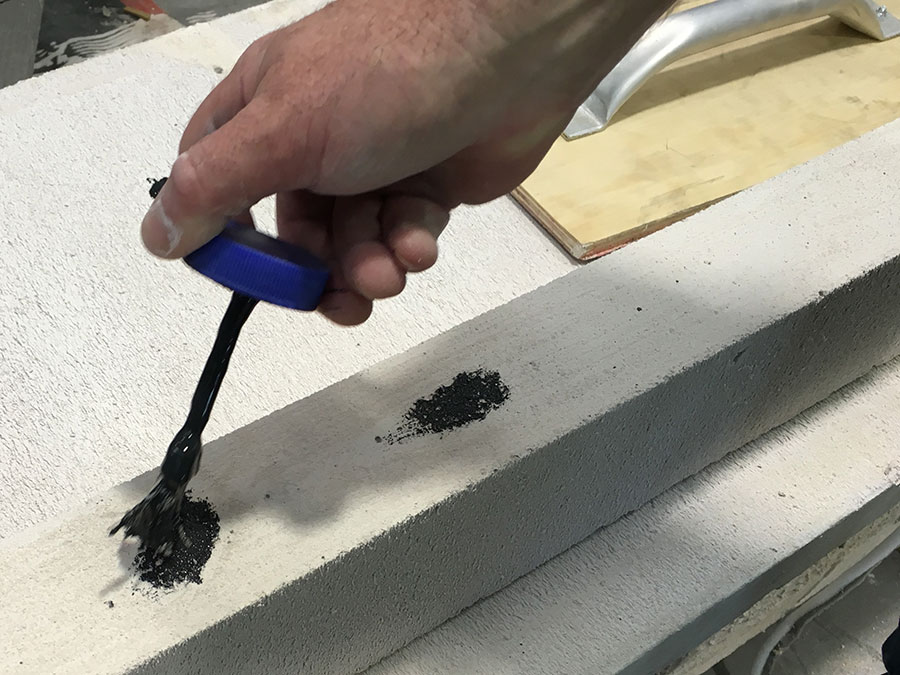
After cutting:
- When cutting panels, you will likely expose some steel reinforcing mesh. This exposed steel needs to be brush-coated with Hebel Anti-Corrosion Paint to prevent rust.
Connecting or joining Hebel
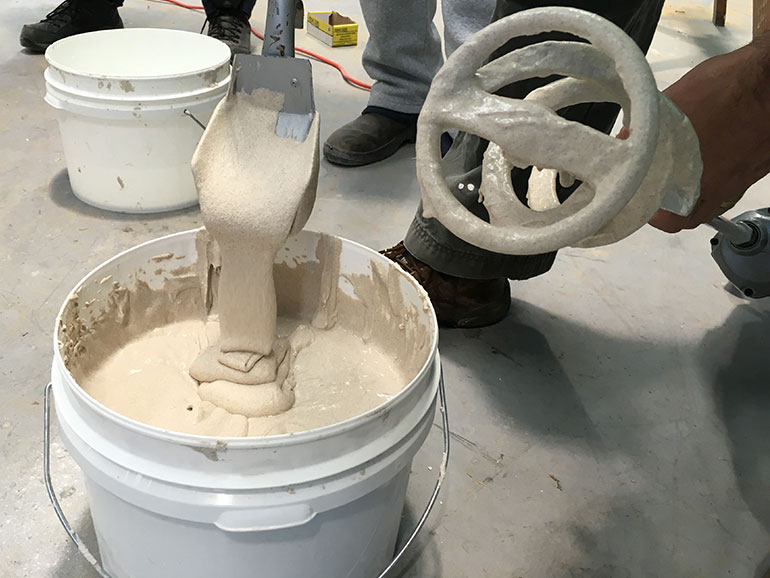
Gluing Hebel to Hebel:
- Use Hebel Adhesive (20kg bag)
- When mixing the glue, it should have the consistency of runny porridge or a light aerated paste
- Once mixed, Hebel glue usually sets in 30 minutes in most conditions, with full strength overnight
- To apply Hebel adhesive, use a Hebel notched trowel – or for DIY jobs, a render trowel, notched tiling scraper or simple paint scraper
Patching Hebel blocks or panel surfaces:
- Use Hebel Patch Compound – mix according to packet instructions, and use it quickly as it will stiffen
- Sand the compound when dry
Fixing Hebel with screws:
- Always screw a minimum 50mm from edges or ends of Hebel blocks or panels
- Embed the screw 5mm below the surface
- Use Hebel Adhesive or Hebel Patch Compound to cover the screw
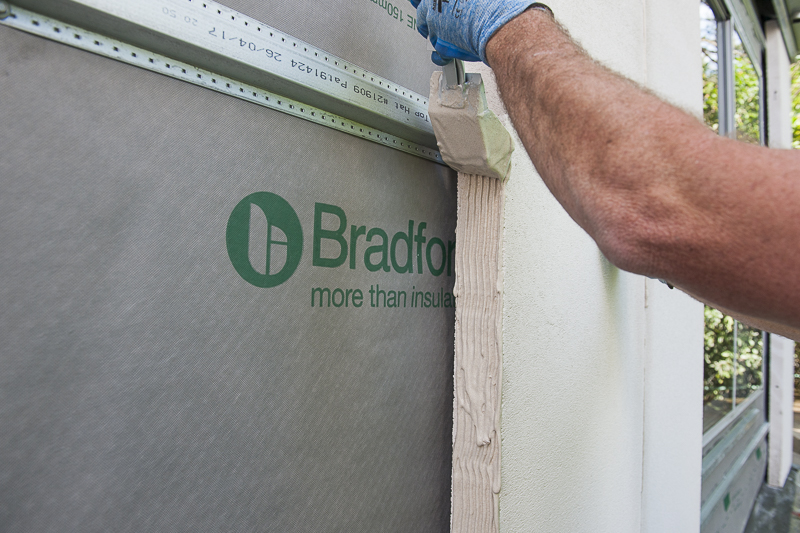
Connecting Hebel panels to structures:
- Connecting to walls – screw Top Hat to frame and screw Hebel PowerPanel to Tophat (see Installation Guide External Walls)
- PowerFloor – glue and screw to joist (see Installation Guide – PowerFloor Low Rise Residential & Commercial Floor System)
Bedding Hebel
To install Hebel at ground level:
Block Walls
- Bedding mortar – mix Hebel mortar according to directions on the bag and apply onto damp proof course (DPC) under first course of blocks to a uniform thickness of between 8-10mm
- Laying damp proof course (DPC) – lay a slip joint membrane at the base of all external and internal walls to allow for differential movement between the blocks and slab/footing
Panel Walls
- Bedding Hebel Panels onto the slab rebate – lay DPC slip joint membrane at the base of all external wall panels on the slab edge rebate to allow for differential movement between the panels and the slab and to prevent rising damp into the base of the panel (note: Hebel Mortar is not applied under the PowerPanel external cladding systems)
Hebel in the ground
To install Hebel below finished ground level:
- Hebel should not have soil backfilled against it.
- A minimum 50mm clearance should be provided between the underside of the panel or block and unfinished ground level or a minimum of 35mm to permanent paving, to eliminate moisture penetration. NOTE: It is the responsibility of the builder to ensure that the installation is carried out by a Licensed Building Practitioner (LBP) if the work is considered to be Restricted Building Work.
Finishing/coating Hebel
Please refer to the Coatings section and seek the advice of an experienced renderer.
Fixing to Hebel
To drill holes or use fixings with Hebel:
- Holes can be drilled into Hebel walls using a masonry drill
- Once the penetration has been filled (e.g. cable or wires), the gap around the penetration should be filled with a reputable flexible sealant such as Sikaflex polyurethane sealant
- To attach a clothes line, light duty gate or similar to Hebel Block Walls, use a Ramset Ramplug (DNP12 12mm diameter 60mm length for a max load of 20kg) or Tox-Ytox plug (12/60 12mm diameter 60mm length)
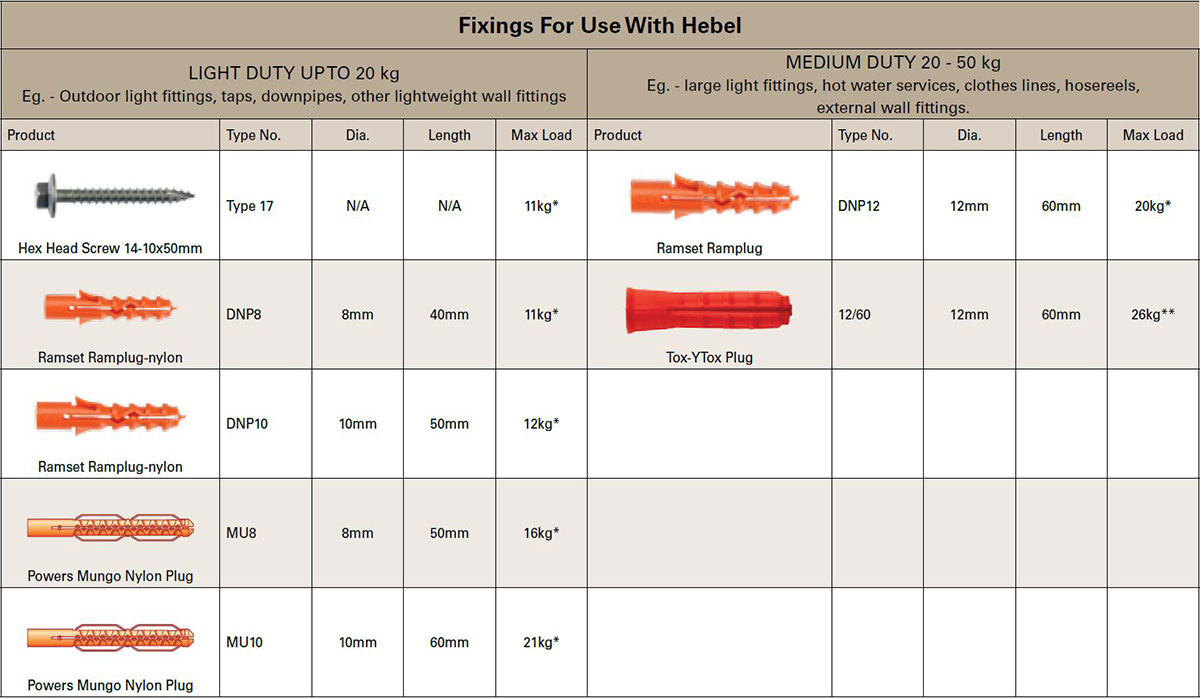
* Factor of safety (FOS) =4 **Factor of Safety (FOS) =5
These fixings are available through selected hardware outlets and building suppliers around New Zealand.
PLEASE NOTE- Items that cause vibrations or excessive loads to Hebel walls must not be secured to the walls, rather these items should be fixed to posts that are independent to the walls and do not transfer loads to the Hebel eg. –Gates, decks, pergolas, carports, basketball hoops etc. If in doubt please contact CSR Hebel on 0800 4 HEBEL (0800 443 235) or +64 3 336 5500 (if calling from outside NZ) 8am – 4.30pm, Monday to Friday.
OTHER HELPFUL INSTRUCTIONS:
For detailed fixing instructions please refer to our comprehensive Design & Installation fixing guides.
- PowerPanel50 External Wall System – New Zealand Design and Installation Guide
- PowerPanelXL External Wall System – New Zealand Design and Installation Guide
- House Low Rise Multiresidential and Commercial Floors – PowerFloor – Design and Installation Guide
- Low Rise Multi-Residential Intertenancy Walls Design and Installation Guide